


Get your seeds started indoors with this handy step-by-step guide with everything from the supplies you need to start your seedlings and have them thrive to exactly what mix to use, water, light, and so much more! Remember to bookmark this post so you can return to it through-out the growing season.
Understanding why gardeners start seeds indoors
- Earlier and longer harvest: Starting seeds indoors means you can start your growing season ahead of time.
- Stronger, healthier seedlings: When you grow seedlings grown indoors, you give them a greater chance to develop well-developed roots in good soil. This in turn helps them transplant better and thrive in their new outdoor environment… leading us back to the point above!
- Cost Savings: Starting seeds indoors is typically less expensive compared to purchasing more mature plants. Generally speaking, seeds are much cheaper and if you’ve been storing them yourself or close with your neighbors, they can even be free!
- Variety: Starting from seeds means you can access a wider variety of plants, including heirloom varieties that may not be available as seedlings in commercial greenhouses. For example, if you want to grow an heirloom tomato that’s resistant to fungal infections like fusarium wilt, and cook up to a nice rich paste that’s highly nutritious… Then you probably have to find it and start it from seed!
- Organic gardening: You don’t really know for sure what you’re buying when selecting mature plants. Growing your own seedlings ensures that they are free from pesticides and other things you don’t want in your food.
- Mental health: There’s nothing like raising your own cucumbers all the way from the seed to your plate! Growing your own fruit and vegetables from seed is a great way to double down on chasing away those winter blues and start getting excited about the growing season ahead – an effect that keeps on giving all throughout the year.
How to start seeds indoors to maximize growing time
- Gather Your Supplies
Having everything ready will make the process smoother and more enjoyable – making your success not only more likely now, but repeatable in the future! This includes seed trays, seed-starting mix, labels, and containers. Containers are like mini, indoor raised beds.
To allow for root growth, they ought to be at least 3 inches deep. You can buy heaps of new ones, or re-use cell packs and trays you get from the nursery. Short of that, look around the house for yogurt cups, plastic take-out containers and cottage cheese tubs. Poke drainage holes in the bottom.
Peat pellets are popular: Just add water and the wafer swells to 7 times its size. But if you need a large number of them, peat pellets can be expensive. Plus, they can stymie root growth once planted in the garden because the outer mesh doesn’t decompose in cooler soils and it acts like a tight-fitting shoe.
If you haven’t yet learned about soil blockers, add this one to your reading list and consider adding it to your gardening supply inventory: The Magic of Soil Blockers - Choose Your Seeds
Select seeds that are suitable for indoor starting, which you’ll usually find written on the seed packet. Consider factors like germination time and the specific needs of each plant. Remember that eventually you will transplant these seeds to your garden, so make sure you’re only starting seeds that can be transplanted.
Here’s some great information on how to order seeds from one of my other blogs: Seed Ordering Made Easy - Prepare the Seed-Starting Mix
A good seed-starting mix is crucial for healthy seedlings. You can either buy a commercial mix or make your own. For recipes and tips, refer to our detailed guide on seed starter mixes.
- Fill Containers with Mix and Sow the Seeds
Fill your seed trays or pots with the prepared seed-starting mix. Ensure the mix when wet is moist, but not waterlogged (more on watering below). This provides a good environment for seed germination, which does not need to be too rich.
Remember– Seeds don’t spring to life when you plant them. Seeds are already ALIVE. All you’re doing is providing the right environment and nutrients to help them come out of their shell. Each seed will have a different depth that should be marked on the packet.
Pro tip: Many sources recommend using a heat mat to germinate seeds, but I don’t advocate for them. They’re often unnecessary and can do more harm than good. While heat mats can be effective for germinating, say, coffee beans, all you really need for germinating most seeds is room temperature.
- Water the Seeds
Just like Goldilocks’ porridge needs to be just right, seeds need their moisture level to be balanced—not too wet and not too dry. Keep the growing mix consistently moist, but not soggy.
After planting, ensure the mix is damp and cover the container with a clear lid to reduce evaporation while letting in light. Check daily for sprouts and remove the cover as soon as you see one. Water with a fine spray or from the bottom to keep the moisture steady, ensuring those tiny roots get just the right amount of hydration without drowning.
- Provide Adequate Light
Like children, seedlings need lots of energy, which for them means light. Light from your window, even a south-facing one, is rarely enough to prevent tall, leggy and weak seedlings — especially in late winter to early spring when day length is still shorter.
Seedlings need 16-18 hours of light each day. So unless you supplement with good reflectors or additional light and rotate your seedlings, you might end up with weak or leggy seedlings! - Maintain Proper Temperature
Start seeds in cozy, room temperature soil for the best germination. Once they sprout, move them to a cooler spot to help them grow strong. Pro tip: Focus on soil temperature, not air temperature.
Here’s a rhyme to remember:
Germinate seeds in warmth,
That’s usually the rule.
To grow them stout and strong,
Keep them in the cool.
- Air Flow
We breathe in oxygen and exhale carbon dioxide; plants breathe in carbon dioxide and exhale oxygen. A match made in heaven. But for indoor plants to get all the CO2 they need, it helps to set up a fan; Even a little one, to create a breeze.
Like doing resistance workouts at the gym, air movement strengthens stems and prepares seedlings for the great outdoors. Air movement helps prevent “damping-off,” a disease caused by a fungus that attacks the plant at the soil line. One day they look healthy and then the day they’ve collapsed onto the soil. Dead air means danger.
Read more about preventing damping-off in this post: Prevent Leggy Seedlings With These Tips
- Thinning The Seedlings
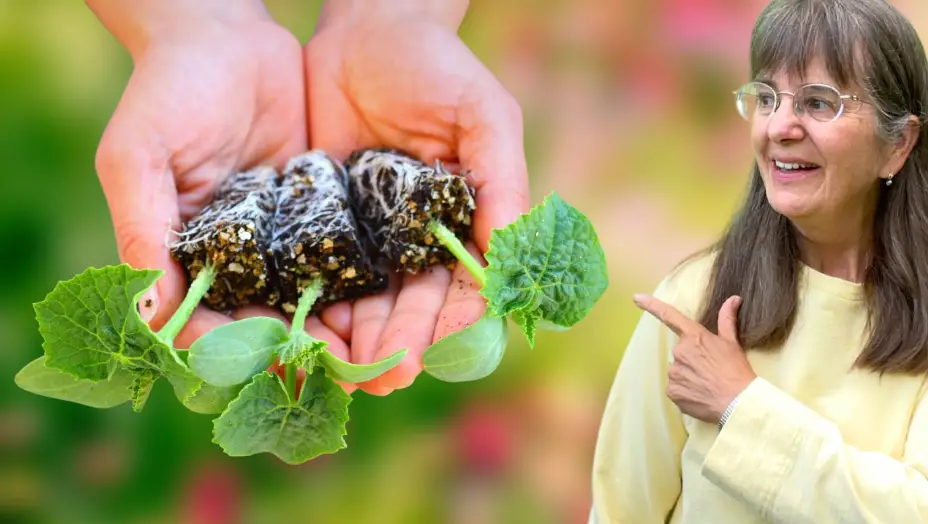
When your seedlings put out their first “true” leaves (usually the second set), that’s your cue to transplant them to a larger container.
Pro tip: When transplanting a seedling, don’t grab the stem. Instead, gently pinch the leaves to avoid damaging the plant.
Then with a narrow tool such as a butter knife or pencil, gently slide it down along the seedling root and lift it up. Place it into a pre-moistened, soil-filled container, slightly deeper than it was in their flats. Firm soil around the seedlings and water if needed.
- Transplant Seedlings When Ready
Seedlings ready for transplanting have their first set of true leaves. If you’ve timed your seedlings correctly, you’ll be ready to move them outside after hardening off.
Transplanting seedlings has three main parts:
- Reading Seed Packets: Learn how to read seed packets and know your frost dates.
- Best Practices: Follow techniques to avoid damaging leaves or roots during the transplanting process.
- Have Fun: Embrace the fun of growing from seed!
Learn more about when to transplant seedlings here.
